How do I remove a picture from my course page?
A picture inside a lesson comes out with one key: click just after it and press Backspace. The cover photo at the top of your course page has its own Remove the photo button. About two minutes.
Updated 2 October 2026
Open the lesson that has the picture in it
Open Products, then Courses, and open your course. Press Lessons at the top, then press Edit beside the lesson.
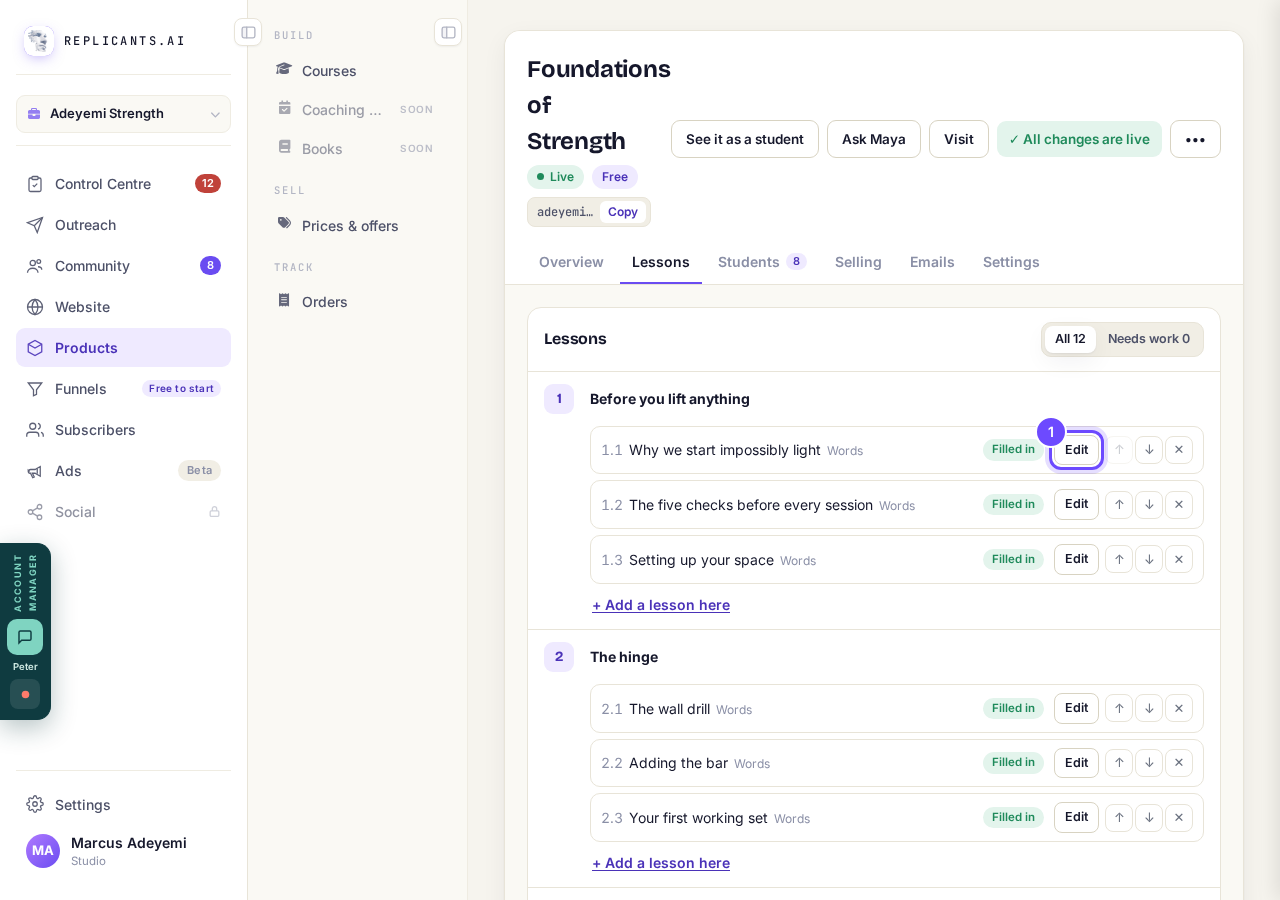
Press Edit beside the lesson with the picture.
Click just to the right of the picture
Click in the white space just past the right edge of the picture, near its bottom corner. A blinking line appears beside the picture.
On a phone, tap in the same place.
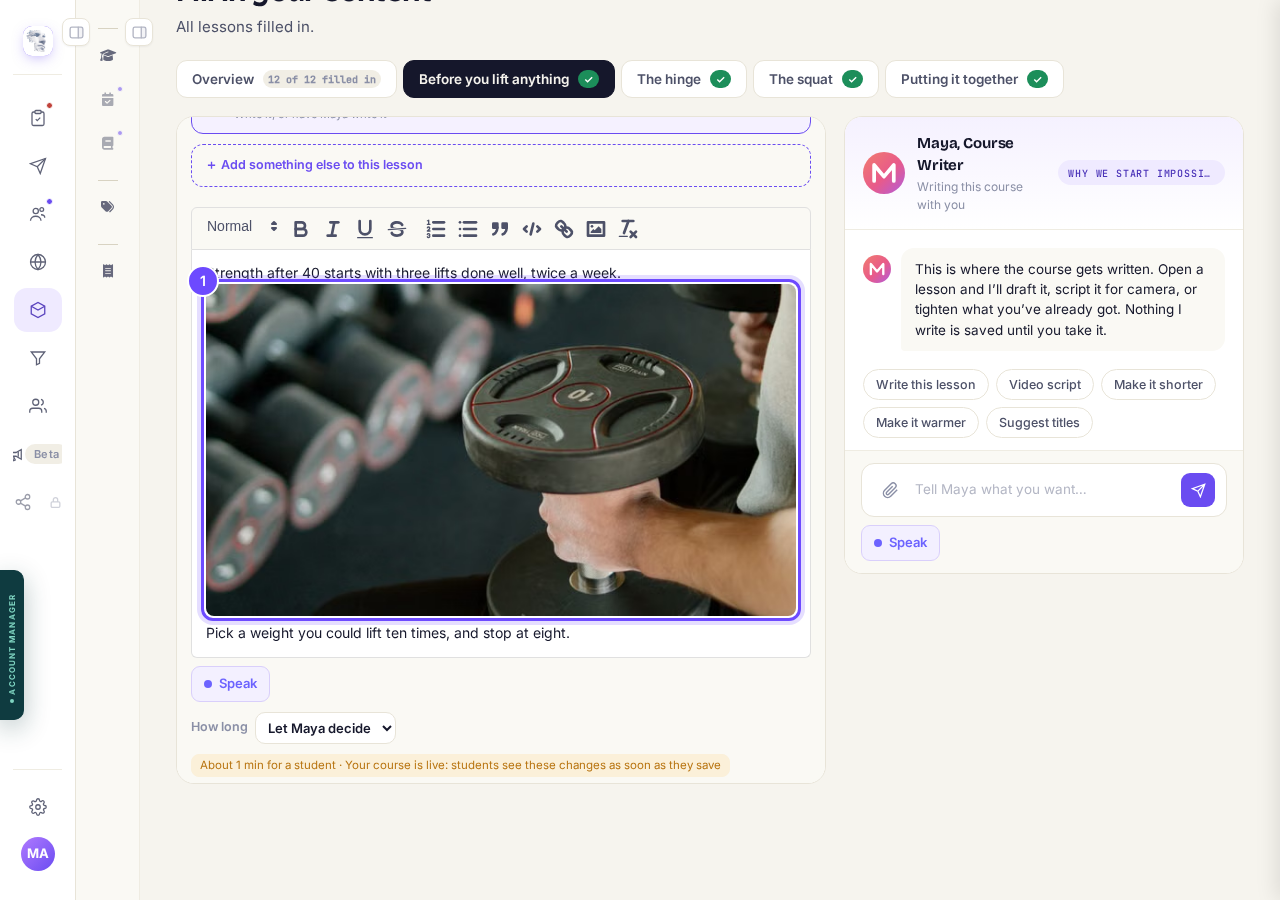
Click just past the right edge of the picture.
Press the Backspace key once
The picture goes. On a Mac the key says delete. On a phone, use the delete key on your keyboard.
A moment later Saved. appears at the bottom of the lesson. Students see the change straight away.
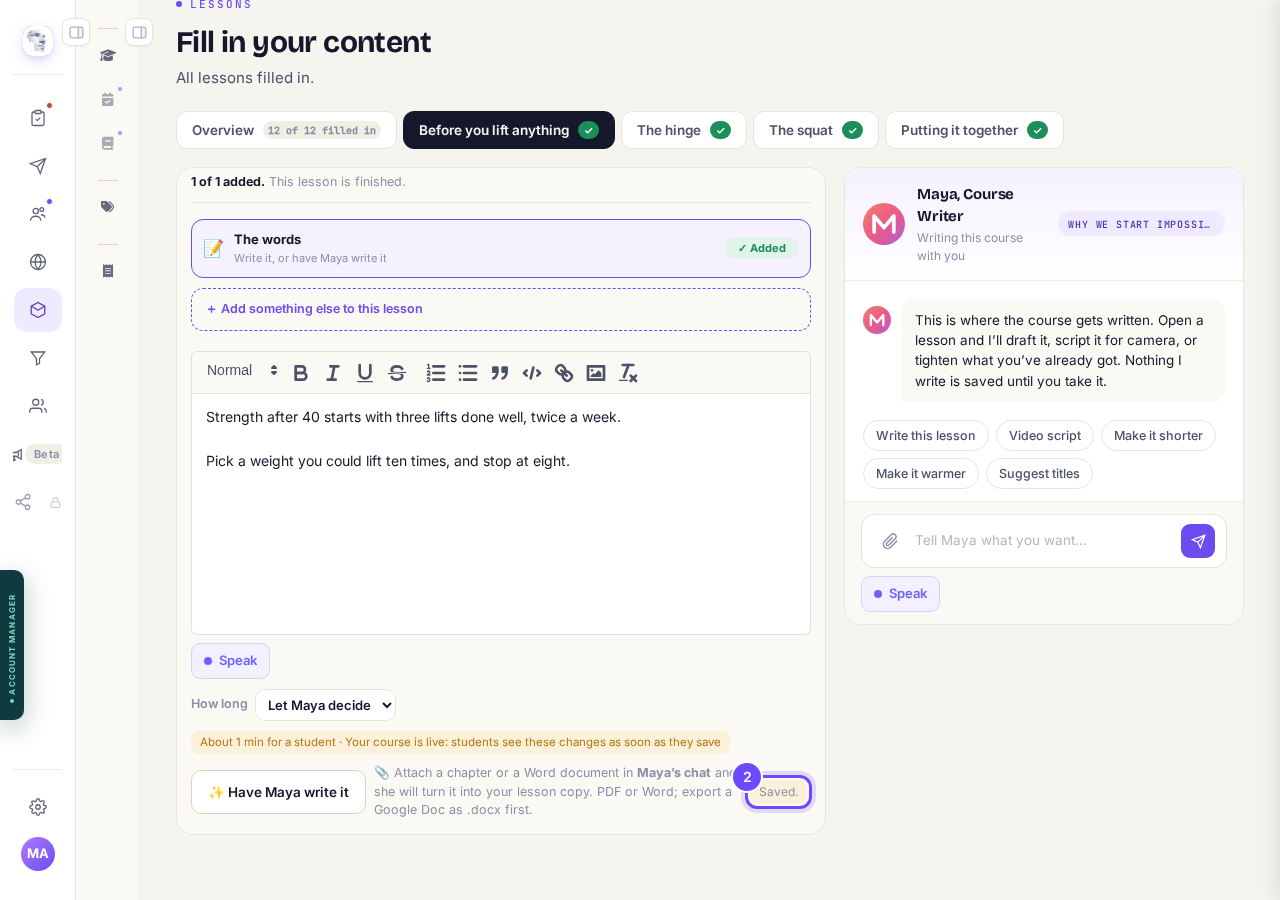
Saved. means the lesson is stored without the picture.
For the big photo at the top, press Remove the photo
Open your course and press Change the look in the Live now box. Press Cover photo at the top, then Remove the photo.
The message Cover photo removed appears, the button changes to Choose a photo, and the preview shows an empty space marked Your cover photo.
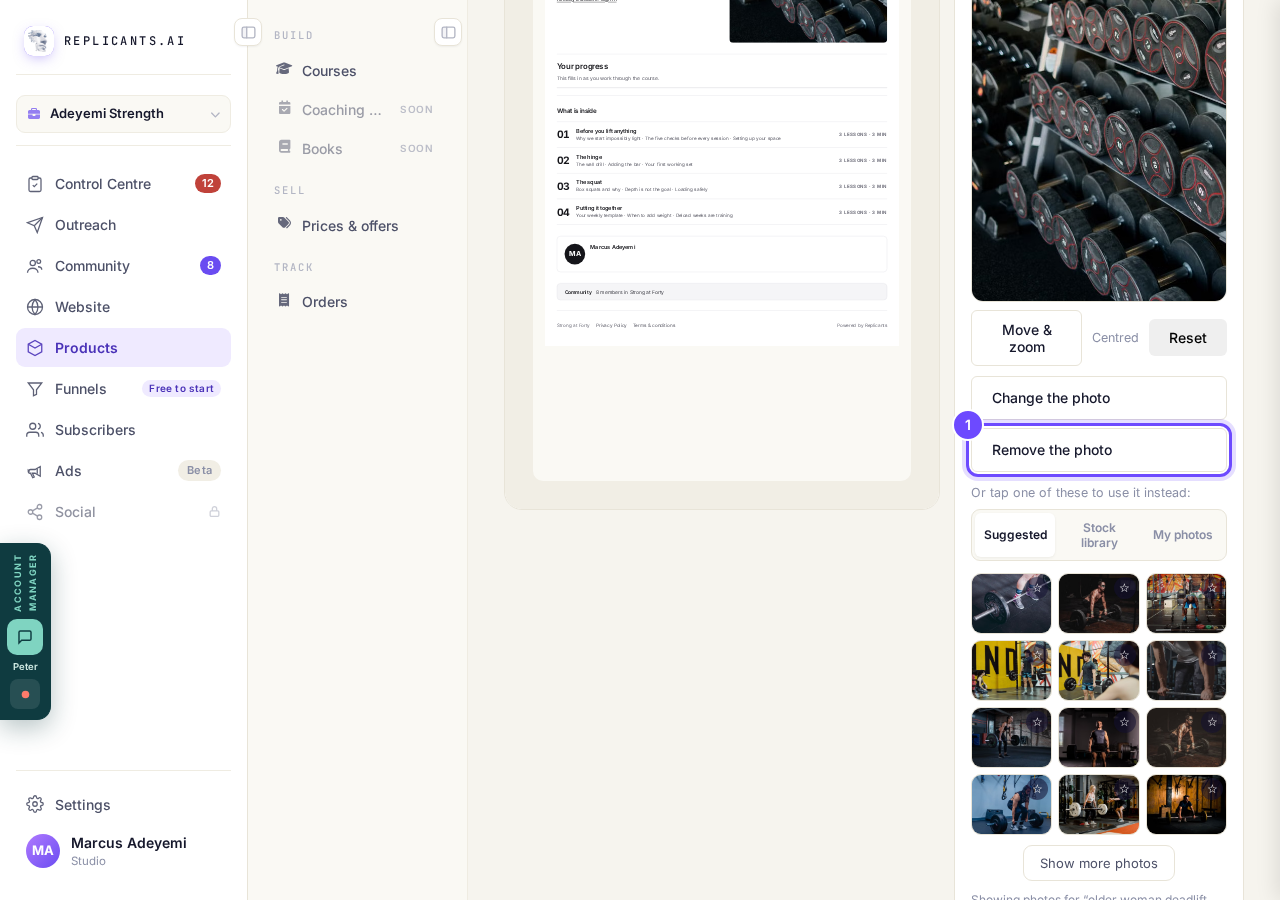
Cover photo, then Remove the photo.
If your course is live, press Publish changes
A live course keeps its old cover until you publish. The Live now box says Your cover photo comes off the page when you publish your changes.
Press Publish changes, then Publish. If your course is not published yet, there is nothing more to do.
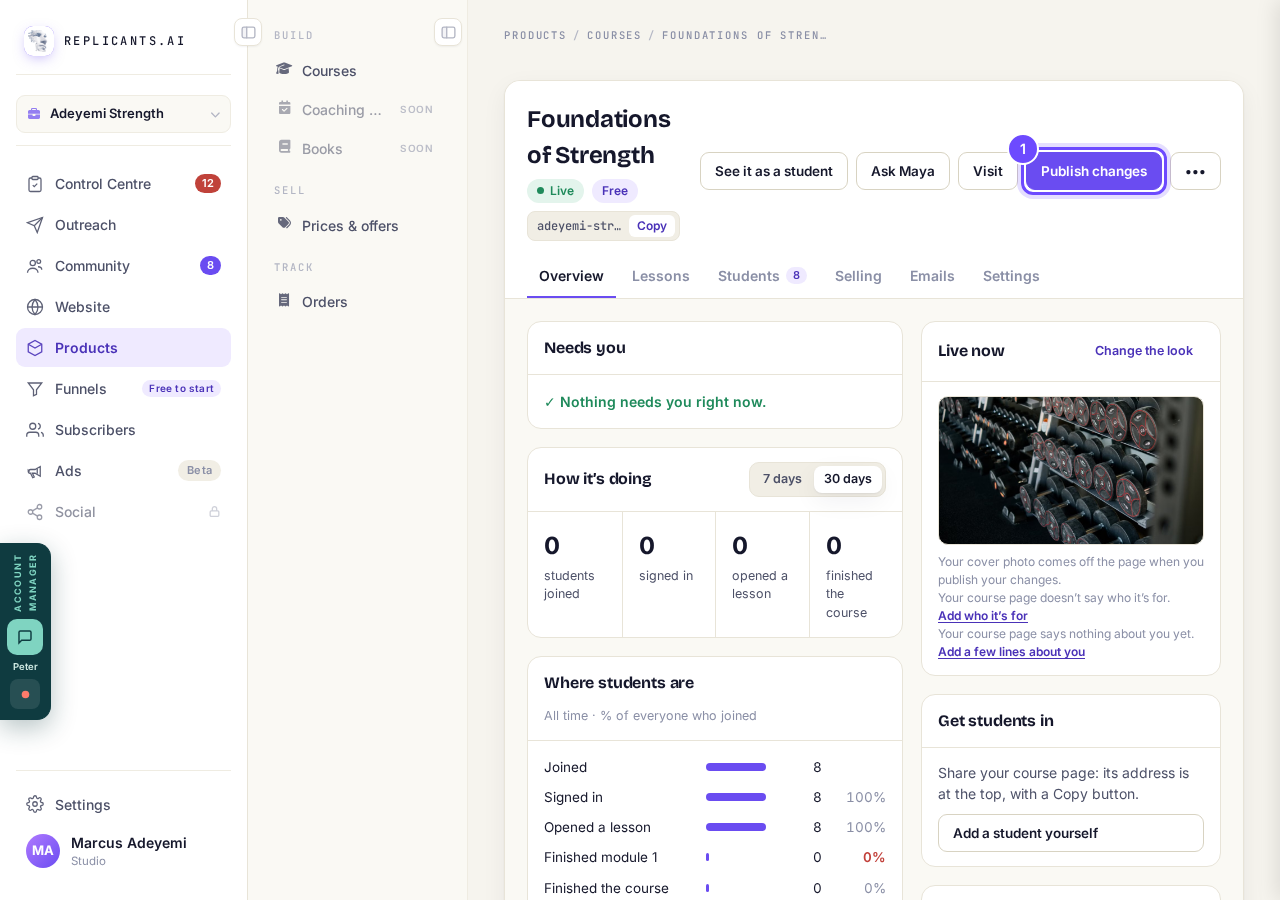
Publish changes takes the cover off your live page.


How do I add, move or rename modules and lessons in my course?
Related articles
How do I add, move or rename modules and lessons in my course?
Every course has a plan screen where you change its shape: add a module, move one, or rename a module or a lesson. It takes about two minutes.
How do I build a course, and what goes in it?
Maya builds it with you from six short questions. Open Products, then Courses, and press New course. She asks where you are starting from, then turns your answers into a plan of lessons that you approve before a word is written. You can speak your answers instead of typing them.
How do I email the students on my course?
Open your course, go to Students and press Email your students. Each student gets your words with their own first name, and an Open the course link that signs them straight in, with no password. About three minutes.